Bra fitting can be a challenge for almost everyone. Even with ready to wear (RTW) bras from the department stores, figuring out the right fit can be a struggle. Every person is uniquely shaped. Bodies can range from wider back muscles, a narrow rib cage, as well as differently oriented breasts. When making your own custom bras, it is essential to make a test version of the sewing pattern before you start using your nice final fabric.
Making a test version of your bra does not have to be labor intensive. Here are a few tips and tricks to speed up the process of making the mockup so you can get to working with your fun final fabrics.
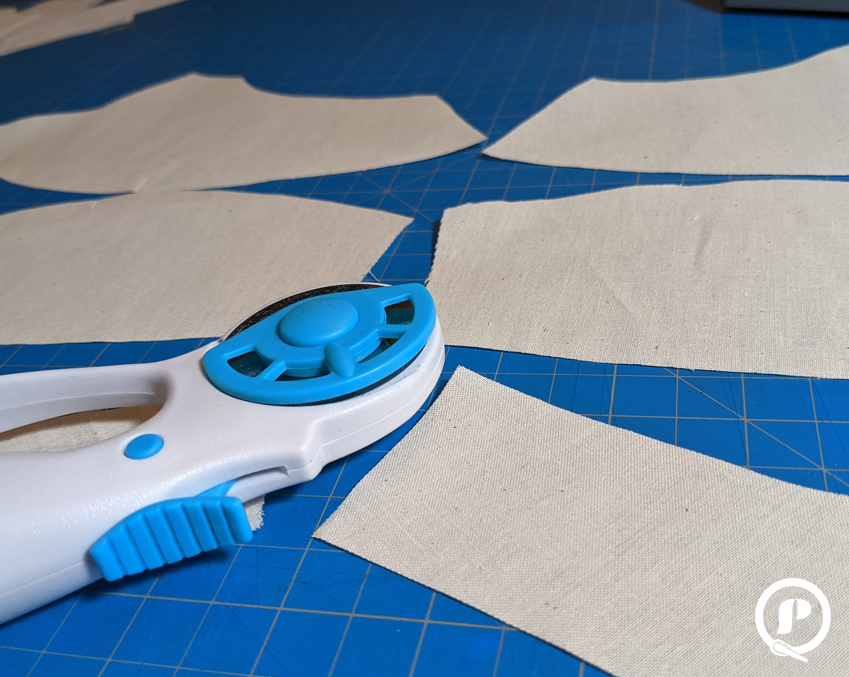
Use medium-weight muslin cloth

In order to trust that the test pattern will fit the same as the final bra, you need to use fabric with the same weight as the final material. Most DIY bra patterns require a non-stretch medium-weight fabric for the cups and cradle. A sturdy muslin cloth is perfect for this. If you can, check that it is labeled as “medium weight” or at least 7oz/yd or more. If you’re unsure if the fabric is sturdy enough, apply some fabric interfacing or double up the fabric.
Alternatives to powernet
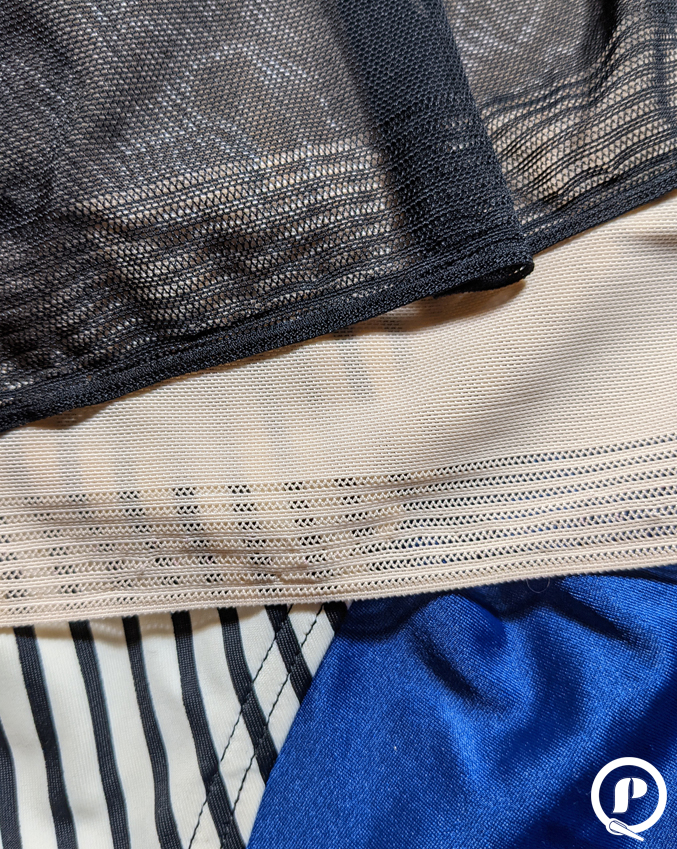
The backband for bras requires a fabric like Powernet (also called Powermesh). For your mockup, you need to use a fabric with the proper stretch on the back band. Most DIY bra patterns are designed for a Powernet with 50% stretch. If you don’t have enough Powernet to spare, use any fabric that has 50% stretch. One economical way is to use material from an old swimsuit. Just make sure whatever material you use has the correct stretch. If the fabric is too stretchy, you can double up the fabric to make it have a little more resistance.
Skip the trims
To save time. you don’t have to use fold-over elastic, picot elastic, or any other finishing trims. Your mockup should be fast and simple so you can sooner get on to the fun part of making your final bra. Omit the outer seam allowance like you would for fold-over elastic.
Recycle bra straps
Harvest bra straps from old bras and keep recycling them for any test bra you make. Don’t use a bartack stitch when attaching the straps. Use a straight or simple zigzag stitch to make the straps easier to detach for future mockup bras
Skip the hook & Eye
This is another time-saver, but it may be hard to slip the bra over your head with this suggestion, so it’s recommended to have an assistant help pin the back in place once you have the bra on. Most bra patterns account for a hook & eye closure that is about 1.5″-2″ in length. You can skip adding the hook & eye to your mockup by making one of the back bands an extra 1″ in length to replace where the closure normally goes. You only need 1″ because of the stretch qualities from the back band material. Just make one back band piece 1″ longer and either stitch the two back bands together, or have an assistant pin the back together after you try on the bra.
That’s it for this article! Hopefully this gives some ideas for your next project!